Showing posts with label kitchen. Show all posts

Monday, June 22, 2015

Chalk Paint Kitchen Cabinets - KITCHEN EVOLUTION UPDATE

It occurred to me today, as I walked through the house for my much needed coffee, that I had never actually done a proper post about my experience with chalk painting my cabinets. So, there's no time like the present. Here we go.

I'm actually glad that it's taken me so long to do this post, because I can also address the wearability and longevity and staying power of this project.


Ok, so let's go back - way back - to 5 1/2 years ago, when Aaron and I got the keys to this house for the first time. If you haven't seen my KITCHEN EVOLUTION post, now might be the time to head over there and read that, to get all the details.  But our kitchen was majorly outdated, and in desperate need of a facelift.


The cabinets had been UNTOUCHED since the house was built in the 50's, and so all things considered, they were in great shape. The fridge was a disaster, it wouldn't even stay shut, so you had to kick it at the bottom to get it to seal. It worked fine for when we were working on the house for keeping cokes and bottled water chilled and for any snacks we might have.... and that was usually Subway.

The tile was mostly perfectly fine. It had been installed when my father in law purchased this house (remember, this is actually his house, we rent from him) he ripped the carpet up and uncovered our gorgeous wood floors, and replaced the old linoleum with this pretty tile. The stove could have worked for us, but we decided to replace it, since we were replacing the fridge anyway. And that avocado range hood had to go.

Have you ever seen anyone more tickled to be ripping down a wallpaper border than this gal? It's my first home, and I'm so proud of what we've done to it.


Ok, so we worked pretty steady for about 3 months, September to November. And we got married on the 12th of December. So we used those twelve days to move and get everything set up and put away etc etc.

So on December 20th, when we came home from our honeymoon and officially moved in (we did not live together before we got married, but because our house is right next door to Aaron's Dad, with whom he was living at the time, Aaron did spend a few nights in the house after we got all of our stuff moved in, just for safety's sake. It was so weird living at my Mom's house with literally nothing in my bedroom except a bed, a suitcase of clothes (since all mine I'd moved here) and my gigantic wedding dress taking up all of my closet for almost 2 weeks) this is what the kitchen looked like.


We painted the walls green, replaced the countertops to the black ones, painted the cabinets dark brown using oil based paint, we got new (actually scratch and dent) stainless steel appliances, we replaced every light fixture in the house.... I actually kind of regret getting rid of that table. It was a PERFECT size for the kitchen, but I do love our current table. Because now we don't have to buy a huge dining table when we buy our forever home.


Ok, so.... fast forward to September 2014. I decided I was freaking tired of the green walls and was longing for something that was a bit more bright and airy. My style was changing. No more was I into the dark colors and the modern influenced things.... I was going towards the bright, airy, country influenced, antique inspired looks. So I thought, to avoid painting the cabinets, which I felt like was going to be a huge undertaking, I would paint the walls and go from there.

Read my post about it HERE. I completely re-did the kitchen for under $80. I ended up using contact paper on our countertops to brighten up that space and for a while, I loved it.


And let me get brutally honest with you.... when the new wore off I kind of felt like my cabinets and countertops looked really cheap. Sort of like a badly manufactured mobile home. Some mobile homes these days are amazing, for reals, but this just had the feel of cheap cheap. But I loved the color of the walls and I loved the lighter countertops, but they were contact paper, it was obvious. And even though it was a "granite pattern," it was a sticky paper. C'mon. But it can be done. And it held up amazing for a year.


So I finally decided, you know what, I'm gonna paint my cabinets. I'd regretted painting them so dark almost from the beginning, and I just felt like something brighter fit us better. And I am all about your home fitting YOU.


April, 2015. I'd been doing lots of research  on chalk paint. I spent pretty much all day every day looking up chalk paint and learning all about it. And what I discovered was that DIY chalk paint was just as effective as Annie Sloan chalk paint. Plus it's WAY cheaper.

So I decided that the absolute cheapest way I could paint my kitchen cabinets was to DIY chalk paint them.

The recipe is so simple.
1 part flat (no primer) paint in the color of your choice - mine was Valspar "Gypsum."
2 parts Plaster of Paris
enough water to mix it all together

I ended up officially using two quarts of paint, 4 cups of Plaster of Paris and around 2 cups of water. You want to mix your PoP and water together separately, and mix it until it looks like pancake batter. Then add it to your paint. I actually bought a plastic bucket at Lowe's when I bought the paint, that had measurements on the side so I dumped my paint in there. (I mixed the rest of the paint into chalk paint a few weeks later, and it keeps pretty well if it's sealed really good.)


2 quarts of paint was all it took for three coats of paint on my cabinets. I had maybe half a cup left over when I was done. The paint is very runny, but you only need to barely dip your brush into the mix. Back brush all you want, get in there with it and use some elbow grease. Don't sand, don't prime. 
Literally slap the paint on. That's the amazing part about chalk paint. It's so easy to use.


I took all my cabinet doors off and all my drawers out (I just put my drawers on my countertop to paint them) and painted the base of the cabinets first. Chalk paint only takes about 20 minutes between coats to dry so while that was drying, I put my first coat on my doors and drawers.

Ok, so you've got the first coat done. And holy crap, you've ruined your cabinets. I should have taken a picture. It was terrifying. It looked like I'd done a really "crap-tastic" job of painting a primer on. It was splotchy and nasty looking. But I was already too far gone, so I just went with it.

The second coat covered up all sins. It started looking really amazing then.

I ended up doing three coats, just because it's a kitchen and I felt like it needed the extra stuff.

Now, once your done, you need to wax the cabinets to seal it all in. I used Minwax in the natural color. Just use an old lint free rag (I used one of Aaron's old cotton undershirts) and applied it in circular motions until my thumbs hurt.

It took me from 10am to 5am the next day to get everything painted, dried, put away and cleaned

THIS was the finished product.

Ok, so this shot was taken with me shoved up in the corner by the window, but it gave me the effect I wanted, entirely. As you can see I took some doors off and made some space for open shelving for our dishes and my antique glass. 


But look closely at this picture...... it STILL looks pretty dog gone cheap. And I couldn't understand why. So I got on Pinterest to look at photos of kitchens with white cabinets and I noticed a reoccurring theme. Black countertops. So after supper that evening, I asked Aaron what his opinion was. And he was pretty adamant about ripping that cheap contact paper up. "It looks like a bathroom!" He exclaimed. And when I showed him a picture of black counters and white cabinets from Pinterest, he got up, stomped into the kitchen and took out his pocket knife and started scoring the contact paper so we could rip it up. 

Ok. Aaron wins this one. It looked so much better that I could hardly contain myself. NOW I was in love with it. 


And here is what our kitchen is looking like today! Sorry for the crappy pictures, I was taking these for the #cleankitchenatnight challenge and they were just gonna get edited in Instagram anyway before I posted them.


As you can see in the above shot, I also swapped out the globes on my triple fixture above the sink. These were just $3 a piece from Lowe's and I LOVE them! They're bubbled glass, but clear, so it gives so much more light to the room! I also worked really hard to eliminate the clutter that was accumulating on top of my fridge. Since we don't have a cabinet up there, it tends to catch lots of random things. Now all that's up there is our air filter and two pottery pieces that were my Mom and Dad's. The cereal boxes you see peeking at you are actually on the top shelf of the Non-Pantry.

My kitchen is so much so my happy place these days. I love the look and the feel of the room, and love how country it is. Aaron tracked down an antique shop one afternoon and brought me home a box full of goodies so that I could decorate with them and I love it.

The only thing left to do is switch out my rugs and replace them with something a bit more country, and they're on order from Amazon. Be sure to follow me on Instagram to keep up with the latest, cause I'm always posting there! The trick to spicing up any space is keeping your overall color - i.e. wall color, cabinet color - pretty neutral and using accents to bring in color and personality. We have lots of aqua blues, some yellows, some pewter here and there, but this space is absolutely ME. And that's what I love about it. The kitchen is the heart of the home, it's the central space, it's THIS woman's domain. And I love it.

It's been several months since I tackled this project all on my own. The paint has held up great. I have nothing to report. I cook at least two meals a day in this room. And it's just as perfect now as it was then. Over time, should it get some wear on it, I'll be fine with it, because I like that look. And everyone loves it. I've had several girlfriends tackle their kitchens since I did mine, and each one with sparkling results. 

So don't be afraid to mix up a little chalk paint and go to work. Since then I've chalk painted some other pieces of furniture in my house and I am trying to resist painting more. I do love painted furniture. 

Verdict: I LOVE IT, it's EASY to mix, it's CHEAP to mix, and it looks SO GOOD!

Disclaimer: Painting is hard work. Painting cabinets is a time consuming process, don't think your gonna have this done in a few hours, cause your not. Plain and simple truth. 

I love y'all!

Saturday, September 20, 2014

$80 Kitchen Remodel Reveal!

When I tell people I redid my kitchen, including now countertops, for around $80, they always look at me like I'm nuts. But it happened, and I've got to say I'm so proud of my thriftiness and creativity!

To get caught up to speed, you should probably read my post on my original PLAN for this room. I followed that up with a step by step of what I had decided to do in Let's Talk Kitchen Renovation! A lot of prices and products I used are listed in those posts.


This project was a LONG time overdue in happening, but now that's it's over I am kicking myself that I didn't do it like this when we originally did the room 5 years ago.  Remember how it looked before?? (The various was it looked before? haha!) To see how it looked in the VERY BEGINNING of our lives here, you can check out the KITCHEN EVOLUTION post.


Yeah, all that's gone now! I can't believe I lived like that for almost 5 whole years!

BUT HERE IT IS NOW!!

Let me show you around! - I would like to note that I got this project finished while I still had all my summer decor out, but now it's all fall-ish at my house, so things decor-wise may look a bit different now.

Yeah! It's so much brighter!! I love it!


I love how the table looks (it's showing up very red in this photo. It's not that red) with the new wall color, so much prettier!


I kept a lot of what I already had over my cabinets, including my big "BLESSED" that I got on sale at Hobby Lobby a few years ago.

It says "Missy's Kitchen, est. 2009" The bottle is a "Cheerwine" bottle. It's a lot like Cherry Coke but more cherry than coke. My Mom used to love it when she was in her early 20's and first married. I think she actually lived in the town where they made it, but I'm not sure. We found this at Cracker Barrel and bought a few bottles! And then the Mason Jar is filled with rocks that I picked up from out of the ocean in the Bahamas when we went in 2013.

My giant "R" was also from Hobby Lobby. I painted the bottle and the star blue with leftover front door paint! And, ya gotta have the glass "RC Cola" bottle. It's Aaron's favorite drink, ever! 

I thought it would be cute to have some photos of Aaron and I in the kitchen when we were little on display. This one is of him, ear to ear in chocolate pudding. How adorable?!
And this one is me, in my Dorothy costume, making biscuits with my Mama. I was probably 3 or 4. 

I change out this picture seasonally, but it's always a shot of me and my Dad. This one is a fun memory. He'd been fishing and pulled up in the driveway yelling for my Mom to bring me outside. He said "I caught a fish that's as big as my baby! Bring her out here and let's measure them up!" And, as you can see, the fish is as big as his baby. :)  Currently there's a shot of him and me, as Little Red Riding Hood, on Halloween in the frame by the window!

The pantry stands out so much more than it did before! It's easier for me to see what I have now!

Here's my iPad/TV set up in the kitchen! It's such a small space I wouldn't have room for a TV, unless it was teeny, so I just hook the iPad up to this iPod dock, put the iPad on an easel, and there ya have it, instant television! :) I use the heck out of this system! (I do need a less obnoxious easel though!)

 My microwave area! It's amazing to me how much easier this room is to keep clean now!! This section of the room was the first to get "finished" and for a moment I thought it was all too light, but after living with it for a few days, I had no regrets!

The stove (it's even prettier now!), and my little helper! She hung in there like a trooper with me while I was doing all of this! I did purchase the hand towel, and pot holder and oven mitt set specifically for the new kitchen and it was a $5 set from Dollar General!

I decided I was too tired to cook the day after it was all finished (I finished it around 2 or 3am, actually) so I stuck a meal in the crock pot! 
I leave this butcher block cutting board out all the time. It's arranged a bit differently now, for fall, but it's still out all the time. A very good idea, and super easy to clean up!


DIY EVERYTHING! Haha! DIY lotion, and DIY lamp! I painted both the lamp base and the shade! If I eventually find something I like better, ok, and if I don't I like this just fine! 


 MORE DIY! I did the "EAT" out of cardboard. I free-handed the letters, cut them out with an exact-o knife (it's not perfect but I didn't expect it to be), painted them blue with leftover front door paint and attached them to the wall with 3M tape! I LOVE it!  The curtains over the windows I found on sale at Dollar General for $5 a panel. I bought 3! (The one over the sink I cut in half and split up the middle!)

 My flowers and DIY table runner! My cooking utensils are actually living in the owl pitcher now, and I'm using my glass cake stand full of homemade cookies as a centerpiece! I loved that I could still use this runner! My Mom made it for me and monogrammed our last name initial onto each end. There's enough teal blue in it that it works!


 Chandelier is even more beautiful now!

The room is a small room. and we have a large table, but it all feels so much BIGGER now that it's so light!


I find myself WANTING to be in the kitchen now. I just LOVE how it all turned out.

Be sure to visit the posts linked above for prices on items (including my "new" countertops) and names of paint colors and such! I'm tickled pink and blue (wink wink) with this room and can't tell you how satisfying it was to completely change it for such a small price!

Thanks for catching up with me today! See y'all soon!


Monday, August 25, 2014

Let's Talk Kitchen Renovation!

CHEAP kitchen renovation. Fake Renovation. CHEAP FAKE kitchen renovation!


So tomorrow I will actually begin the process of renovating my kitchen and thought it might be nice (helpful? informative?) to lay all my definitives out in a blog post so that when it's all finished we can all look back and see how the ideas and specific items all came together to create my "new" kitchen!


First off - PAINT. A trip to Lowe's Friday night was super successful. We settled on a color called "Classy" by Allen+Roth (Lowe's in-house brand).  I basically went up to the display (I had a color swatch for my cabinets with me so I could match it up) and grabbed every light beige swatch that I could find and held them up, in a bunch, against the cabinet swatch. I illiminated a ton in that first go round. It was like American Idol auditions in the paint section at Lowe's. Missy's Kitchen Idol. Ha! Some were too grey, some too yellow, some too pink. We had it narrowed down to 3 and Aaron ended up being the decider, the choice-maker. "Classy!"


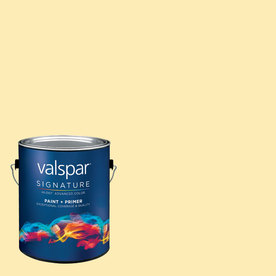
A gallon of Allen+Roth Valspar "Classy" in an eggshell finish (my go-to finish) with primer mixed in (the only way to go these days y'all) and in the Signature line (recommended by the sales guy for the kitchen) cost me $32.98. Here's the best part. Lowe's is running a sale right now where you buy a qualifying gallon of paint and you get a rebate back! I definitely wanted to take advantage of that deal. I sent our rebate info in online just a few minutes ago. From what I'm understanding it will be about a $10 rebate. I think the rebate offer runs until 9/3, so if you need to paint something but can't afford paint, give this a shot. I'm really pleased with my Allen+Roth paint in the bathroom and from the swatch I rushed home and painted on my kitchen wall Friday night I will be very pleased with it in the kitchen too!

I didn't want my kitchen, or my house, really, to be a Beige Palace, so it was important to choose something on the whiter side (it's showing up SO YELLOW on the online swatch) and to be very set about my choice of accent color! AQUA BLUE! Heller! 


Next, we decided on our countertops. No way in this world could we afford $3000 to replace the counters again so we decided to do a contact paper resurfacing. I showed you the screen cap in The Plan post of the "granite" we were looking at. If you didn't see the screen shot, go check out that post. We finally purchased it and I went ahead and set it for one day shipping. It will be here on Tuesday and I can finish the job then. It cost exactly $36.02 with the rush shipping. 

Current total: $69.00


This afternoon we spent time at my Mom's house where I recruited a LARGE cardboard box to help me along in my quest for a giant "EAT" sign in my kitchen. I am debating as to whether to have it go horizontal (on the wall behind my table) or vertical (on the small wall between the utility room door and the window, where the shelves had been). Any suggestions there?

Art Decor: FREE


Last night I dipped into my blue paint and painted a few items to go over my cabinets and collected a couple of photos as well. And I am about to dive into my curtain stash to see what I have that may work on the off chance I don't think the kitchen curtains will cut it for me.

Like I said, I'm planning this out for a two day transformation and not a one day. I could probably do it all in one day, but I just don't think I can physically do it at the present. In fact, as I type this I feel one of my famous headaches coming on, so I will be running on low energy - high caffeine all day long tomorrow.

Tomorrow - Day 1
  • CLEAN ROOM VERY WELL
    • under fridge
    • on top of cabinets
    • pantry
    • Wipe down counters and cabinets with white vinegar/water mix
  • Remove all decor items from walls/cabinets
  • Fill in any screw/nail holes (of which there are MANY) with spackle
  • Disassemble room ( I will have to shove my kitchen table up against my cabinets, move all my chairs into my office put all my pantry and decor items on the table, etc.)
  • Trim out all walls
  • Make artwork (EAT sign) 
  • Decide on curtains and alter them
Tuesday - Day 2
  • Finish painting walls
  • Resurface counter tops and back splash with contact paper
  • Reassemble room 
    • Hang artwork 
    • Hang "new" curtains
  • Cook a fabulous supper in a "brand new" kitchen
  • Sleep like a dog-gone baby after 2 days of such hard work!
I will have to be sure to have an iTunes Playlist/Pandora Station/Movie or TV show on Netflix blasting to keep me motivated! Worry not, precious followers, I will photograph every step of the way!


Renovating a kitchen DOES NOT have to cost a ton of money. $70. That's all I've spent for this project. That's it. And that's all I intend to spend, period. ;)


Ok, I can't stand it anymore! I'm gonna go start pulling things off of the walls and prying a few stubborn mollies out of the drywall!

I'm so excited! I'll check in with everyone later in the week and show you how things are going!

Love y'all!


Friday, August 22, 2014

The Plan

Good Afternoon my few and faithful! 

Today I want to share with you my planning/thought process when I'm planning out a home "redesign" project.

The room I'm working hard on at present is the Kitchen. I recently finished - pretty much - my home office and am just waiting for a final touch or two to finally share it with you. I need a handful more of little items to be able to call it a wrap on that room. But now I'm turning my near full attention to the kitchen.

If you read my Kitchen Evolution post you will know it's been through it's ups and downs. When we first "took possession" of the house and started renovating we painted the cabinets a dark chocolate brown with a very expensive oil based paint. The cabinets are old, from the 1960's, and are a flat panel door. I don't particularly care for flat panel doors, period, but this house is full of them, so I'm living with them. We also chose to paint the walls a sage green color. A very pretty color, but as my home evolves, it's becoming the odd man out. We even went ahead and had the counter tops replaced.

I ended up going with our dark counter tops because granite was unavailable at the time, because of money, and there was nothing else in the store that I liked, even remotely. Plus is went with dark cabinets and green walls. It was the most evasive thing we did when working on this house, and I'm still glad we went ahead and did it. 

As these 5 years have worn on, my house has undergone some big changes and for the most part, the kitchen has always felt ok to me. The decor started leaning more toward the country style, with floral curtains and floral china pieces being displayed over the cabinets, and then we introduced the big new table into the room and that pushed it even further country. But as the house turned blue around it (comment below if you would like to see a tour of everything aqua in my home) the green kitchen started feeling like the loner kid on the playground. 

So, what do I do? I start by thinking about it. For the longest time, I felt the fault was with the cabinets, so I started thinking of ways to lighten up the cabinets, and had even settled on buying white contact paper and covering them, in their entirety. But one afternoon I was cruising Pinterest, like I do, and saw a photo of dark cabinets against a light beige wall. And the light bulb in my head not only came on, but it started flashing.

You're doing it wrong! Don't paint the cabinets! DON'T contact paper the cabinets! Paint the walls!

It was pretty clear the direction I needed to go after that realization, so I had to start to hatch my plan, by listing what is important to me in the project.
  • It cannot cost a whole lot of money - and I must unload some of my "sellables" in order to fund such a project. Perhaps the "Bank of Husband" would work finance a loan haha!
  • I'd like the walls to be a light beige color, to flow with the rest of the house and to work well with my aqua accent color. I would definitely be going with a paint color from Lowe's Allen+Roth line because it is only $30 per gallon.
  • (as with the office) Paint, or DIY as many accessories as possible to save money.
  • Contact paper the nearly black counter tops.
After making out the list (it's usually a mental list) of the things I want to accomplish in the room, I go to Pinterest and create an inspiration board to help me visualize how it will turn out. Check out my "Kitchen Spruce Up" board HERE. I determine, from there, the style I'm going for and what will work in my space and what won't. It always helps that I have a creative mind.

Then I add the things that "speak to me" from Pinterest onto my list. 


  • New curtains (or re-purpose some I already have) for both windows. (One set will go to the floor)
  • new artwork - DIY I love this giant "EAT" from sweetpickinsfurniture.com.
    I like the mix between old & new here. Cupboard, light, wood, letters. I can even see adding some girly features (ie. Sparkly backsplash, fresh flowers) and a chunky farmhouse table.
    This could be accomplished by either buying the letters from Michaels (around $2 a letter I think) or I could have my father in law, wood craftsman that he is, cut them out for me, but then I decided that cardboard would be the easiest route to go. A little cardboard, some paper mache and a little aqua paint and we are in business. Completely free because of my left over aqua paint from my Front Door Makeover!
    I also like the idea of simple kitchen art, like this Mason Jar print from printabledecor.net
I find I am much more satisfied, and proud, of my end results when I do things myself. 


 I know that I want whatever the end result to be to work well with Aqua accessories. So I find photos like the one above to help me visualize how much aqua is too much or not enough. BTW, if my kitchen was this size, I'd never leave it. Are you kidding me? I love it!  Plus, if you go into Kohl's now they are offering so many fun, bright colored kitchen products. They will probably be going on sale soon to make way for Christmas things! I can't wait for that! (I want the aqua blue little cow shaped figurine so bad!)

After I've got my Pinterest board set up, I head over to Amazon, to check out their selection to see if I want to buy, or to DIY and re-purpose. In this case, I already know I want a counter-top looking contact paper to cover my counters. Originally I thought I would go with something just for the back splash, but after I started looking, I found this.
And yes, I screen-shot this for ya'll to see. (My pink polka dot theme came from Firefox's add-ons page, in case you were wondering.) Here's a link to the Amazon Listing. As soon as I saw it, my brain shot to an image of my brown cabinets, beige-y walls and aqua goodness sitting on top. I knew it was the one. I ultimately decided it'd be safest to go with the 75ft roll for $30 to be on the safe side.

The only other thing I knew I might want to spend a little cash on was some curtains, and I've been lucky on finding inexpensive sheer curtains (my favorite style) on Amazon for about $8 for 2 panels. But what color did I want? I was afraid if I went with an aqua color I'd end up getting this insane bright neon blue color, and I didn't want that, at all. Best to stick with a neutral if you ask me. I could do with a set of "ivory" sheers for $8 per 2 panels, as I'd expected. But after thinking about it for a while, I decided against buying new curtains. I got creative again. The sheer curtains on our big living room window were just hanging there, and we already had a set of drapes hanging there, so the sheers were just adding bulk to the window coverings. And that window is huge, I mean huge. So I thought about it, and decided to re-purpose those sheers. It will save that $8, and I can put it toward the paint and/or contact paper. The windows in this house (except for the big window in the living room) aren't exactly "pretty" but my "cover it up" attitude from 5 years ago really sucks now because of the lack of any natural lighting. I'll clean the fire out of the windows and the ledges and deal with the cracks if it means I can have a light and bright room to hang out in,


A lot of this project will be the de-clutter of my over the counter shelf, using the bare bones of decor - my large dark brown "R" will stay, for sure, my "Blessed" from Hobby Lobby will stay and a few other little knick knacks will stay. I will add in a few items - I have a gold basket weave star shaped box my Dad got me years and years ago (I love stars) that I am planning on slapping a little aqua paint on. I also have a star shaped box that has the world "believe" written on it that I will probably add as well as some other things I have laying around the house. My floral china pieces I think I will tuck away in a box for now, because until I have a proper china cabinet, I just don't feel like they will 'go' with the new look. I also really like the idea of a few photos up there. I've got some cute ones of me when I was a baby "cooking" with my Mama, and then a couple of cute ones of Aaron when he was a lil' tyke... especially the one of him with his face covered, ear to ear, with chocolate pudding. Adorbs. So that's an idea too.


OK. After I decide for sure what I want to do, I go to Lowe's and look at my paint options - we are going tonight. If I am dead set, I'll go ahead and purchase it, but if not, I'll take a sample home and check it out with the surroundings to see if i like it, I would specifically check to see if it "went" with our counters. But since I am changing the counters too, I will probably just go for it and buy tonight.

The middle of September will start to be super busy for me (I'm doing another play!) and so I won't have that much time to devote to home redesign. So I want to get this project done soon, very very soon. Like, next week soon. I'd like to start it tomorrow but I don't have my contact paper (unless I miraculously find it at Lowe's tonight!), and I'm the type of person that likes 1 day transformations.  Pretty much all my redesigns are done in a single day.

So now that I've got my plan pretty much in place, I clean the room, thoroughly, and get it ready for it's makeover!


In short (too late), here's The Plan!
  • paint the walls
  • contact paper the counter tops
  • paint accessories
  • diy some art
  • diy "new" curtains 
  • redesign over the cabinet decor 

I'll update you all when the project is finished. I will also post photos of the office as soon as those final touches are in place!


Here I go, again!

Thanks for stopping by again today! I love you all!