So tomorrow I will actually begin the process of renovating my kitchen and thought it might be nice (helpful? informative?) to lay all my definitives out in a blog post so that when it's all finished we can all look back and see how the ideas and specific items all came together to create my "new" kitchen!
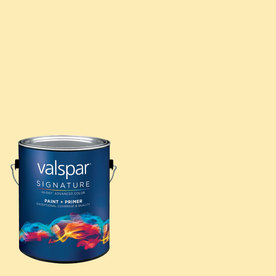
First off - PAINT. A trip to Lowe's Friday night was super successful. We settled on a color called "Classy" by Allen+Roth (Lowe's in-house brand). I basically went up to the display (I had a color swatch for my cabinets with me so I could match it up) and grabbed every light beige swatch that I could find and held them up, in a bunch, against the cabinet swatch. I illiminated a ton in that first go round. It was like American Idol auditions in the paint section at Lowe's. Missy's Kitchen Idol. Ha! Some were too grey, some too yellow, some too pink. We had it narrowed down to 3 and Aaron ended up being the decider, the choice-maker. "Classy!"
A gallon of Allen+Roth Valspar "Classy" in an eggshell finish (my go-to finish) with primer mixed in (the only way to go these days y'all) and in the Signature line (recommended by the sales guy for the kitchen) cost me $32.98. Here's the best part. Lowe's is running a sale right now where you buy a qualifying gallon of paint and you get a rebate back! I definitely wanted to take advantage of that deal. I sent our rebate info in online just a few minutes ago. From what I'm understanding it will be about a $10 rebate. I think the rebate offer runs until 9/3, so if you need to paint something but can't afford paint, give this a shot. I'm really pleased with my Allen+Roth paint in the bathroom and from the swatch I rushed home and painted on my kitchen wall Friday night I will be very pleased with it in the kitchen too!
I didn't want my kitchen, or my house, really, to be a Beige Palace, so it was important to choose something on the whiter side (it's showing up SO YELLOW on the online swatch) and to be very set about my choice of accent color! AQUA BLUE! Heller!
Next, we decided on our countertops. No way in this world could we afford $3000 to replace the counters again so we decided to do a contact paper resurfacing. I showed you the screen cap in The Plan post of the "granite" we were looking at. If you didn't see the screen shot, go check out that post. We finally purchased it and I went ahead and set it for one day shipping. It will be here on Tuesday and I can finish the job then. It cost exactly $36.02 with the rush shipping.
Current total: $69.00
This afternoon we spent time at my Mom's house where I recruited a LARGE cardboard box to help me along in my quest for a giant "EAT" sign in my kitchen. I am debating as to whether to have it go horizontal (on the wall behind my table) or vertical (on the small wall between the utility room door and the window, where the shelves had been). Any suggestions there?
Art Decor: FREE
Last night I dipped into my blue paint and painted a few items to go over my cabinets and collected a couple of photos as well. And I am about to dive into my curtain stash to see what I have that may work on the off chance I don't think the kitchen curtains will cut it for me.
Like I said, I'm planning this out for a two day transformation and not a one day. I could probably do it all in one day, but I just don't think I can physically do it at the present. In fact, as I type this I feel one of my famous headaches coming on, so I will be running on low energy - high caffeine all day long tomorrow.
Tomorrow - Day 1
- CLEAN ROOM VERY WELL
- under fridge
- on top of cabinets
- pantry
- Wipe down counters and cabinets with white vinegar/water mix
- Remove all decor items from walls/cabinets
- Fill in any screw/nail holes (of which there are MANY) with spackle
- Disassemble room ( I will have to shove my kitchen table up against my cabinets, move all my chairs into my office put all my pantry and decor items on the table, etc.)
- Trim out all walls
- Make artwork (EAT sign)
- Decide on curtains and alter them
- Finish painting walls
- Resurface counter tops and back splash with contact paper
- Reassemble room
- Hang artwork
- Hang "new" curtains
- Cook a fabulous supper in a "brand new" kitchen
- Sleep like a dog-gone baby after 2 days of such hard work!
Renovating a kitchen DOES NOT have to cost a ton of money. $70. That's all I've spent for this project. That's it. And that's all I intend to spend, period. ;)
Ok, I can't stand it anymore! I'm gonna go start pulling things off of the walls and prying a few stubborn mollies out of the drywall!
I'm so excited! I'll check in with everyone later in the week and show you how things are going!
Love y'all!


No comments:
Post a Comment